
This section will explain how to change the look/design of the following sections:
- Cart display
- Proceed to Checkout button
- Bottom text (e.g. These are your current items in your shopping cart...)
To change the look/design of the cart display, please follow the steps below:
1. Open the “main-responsive.css” file using Notepad. The file is located in “templates/default/css”.
2. Locate the code below:
.col-md-12 > #vp_bodycontent div#contactus_form, .col-md-12 > #vp_bodycontent #contactus_compinfo, #vp_bodycontent div.cart-product-section, #vp_bodycontent div.cart-pricing-section {
padding-left: 25px;
padding-right: 25px;
}
Directly update the CSS to reflect your own style as mentioned above. You need to be familiar with CSS in order to update this.
For more information about CSS, please refer to:
http://www.w3schools.com/Css/default.asp
For example, if you wish to change the text color to blue, then please update the CSS as shown below:
.col-md-12 > #vp_bodycontent div#contactus_form, .col-md-12 > #vp_bodycontent #contactus_compinfo, #vp_bodycontent div.cart-product-section, #vp_bodycontent div.cart-pricing-section {
padding-left: 25px;
padding-right: 25px;
color:#00F;
}
3. Save the file and upload to the “templates/default/css” folder.
Preview of the example above:
Now, we will try to change the look or design of the button in shopaddtocart.asp. By default, the button “Proceed to Checkout” in the page can be set up from the Administration.

You can upload your own image to replace these.
To update your own image button to replace the Proceed to Checkout button, please follow the steps below:
1. Upload your own created button image to the “templates/default/images” folder.
2. Log in to your VPCart Control Panel.
3. Go to Advanced Settings > Software Configurations.
4. Search for “xbuttoncheckout.”
5. Enter value. For example, “templates/default/images/yourownimage3.gif.”
6. Click “Continue.”
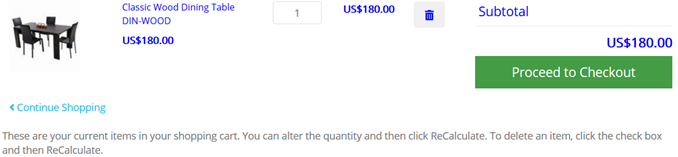
Example of the
use of custom image for the Proceed to Checkout button:
We will now change the text at the bottom, which is displayed
as:

To change the bottom text in “shopaddtocart.asp,” please follow the steps below:
1. Open the “Shopaddtocartdesign.asp” file using Notepad.
2. Locate the code below:
<p><%=GetLang("langCart02")%></p>
3. Simply change the code above to suit you own style or preference.
For example, if you wish to change the font color to green and
set the text to
bold, then please update
the code above to:
<p style='color:#009900;'><b><%=GetLang("langCart02")%></b></p>
Preview of the example above:
