When you login to the administration, you will see a series of menus across the top of the page. It depends what your user has been given access to as to which menu items they will see.
If you want to add or delete menu items from the administration, you can do so by going to Advanced Settings » Admin Navigation & Buttons.
From this page you can delete, edit and add new menu items.
The menu navigation level in shop administration enables you to setup level 1, level 2, and level 3 menus.
Level 1 menu will be the main navigation menu at the top :

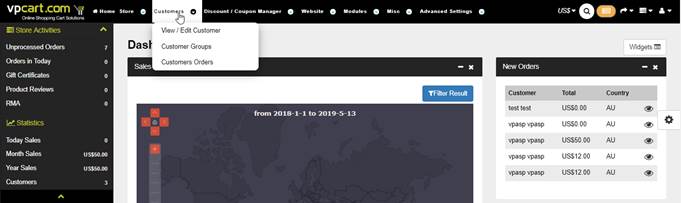
Level 2 menu will be the dropdown list of the main menu :
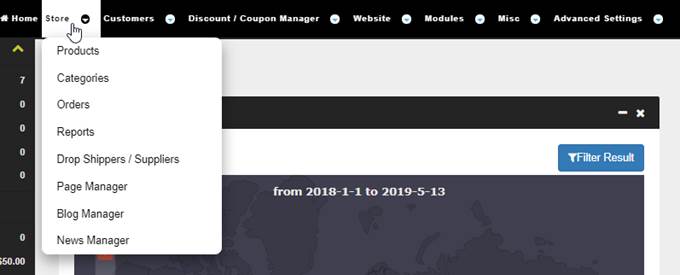
Level 3 menu will be the submenus
that appear after we click one of the menus in level 2:

The image above shows the submenus after admin clicked the Products submenu.
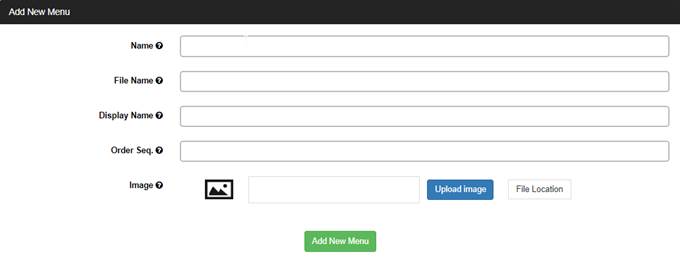
To add a new menu, scroll down to the bottom where you will find the Add New Menu form which looks like:
If
you want to edit a menu, click the Edit icon of the menu.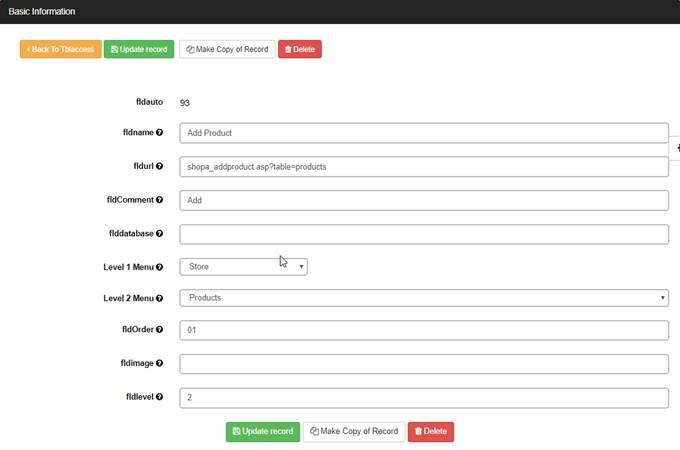
Menu Name: This is the display name for the level # menu item.
Filename: This is the file the menu item will link to.
Display Name: This is the name that menu item will be displaying.
Order Seq.: The order sequence for the level # menu item.
Level 1 Menu: This is the dropdown list for level 1
menu.
Level 2 Menu: This is the dropdown list for level 2
menu.
The default level 1 and level 2 menus hierarchy are:
|
Store |
Customers |
Discount/ |
Website |
Modules |
Misc |
Advanced Settings |
|
Products |
View/Edit Customers |
Quantity Discount |
Menu Manager |
Affiliate Manager |
Query & Export |
Software
Configuration |
|
Categories |
Customer
Groups |
Coupons |
Layout Manager |
SEO Manager |
Bulk Import |
Admin Navigation |
|
Orders |
Customers Orders |
Customer Discounts |
Template/ |
Recurring Billing |
Bulk Update |
Admin User Management |
|
Reports |
|
|
|
Invoice
Manager |
Edit Tables |
International |
|
Drop
Shipper/ |
|
|
|
Gift Registry |
Export Tables |
Shipping & Handling |
|
Page Manager |
|
|
|
Customer
Loyalty Points |
Diagnostic Manager |
Remove Credit Card Info |
|
Blog Manager |
|
|
|
Pin Number
Delivery |
Database Tool |
|
|
News Manager |
|
|
|
Gift
Certificates |
Multi Sites Set Up Tool |
|
|
|
|
|
|
Google
Add-Ons |
|
|
|
|
|
|
|
Payment
Solutions |
|
|
If you wish to add a new dropdown menu, instead of typing in one of the names above, type in your new name (eg. "mymenu" - without quotes) and it will automatically be added to the menu at the top.
You are able to assign image to Level 2 and Level 3 Menu, but it is not a "required" field.
To add an image for your new menu, go to shopa_menu_control.asp and click Edit for the menu you have just created. In the “fldimage” field, enter the image file name e.g. edit_testmenu.gif and upload the image to the folder “admin/images/icons”.
fldOrder: This is the order by which the menu item will appear in the subsection.
Once you have added your menu, you need to add it to your user’s logins so that they are authorized to see it (see page 168for more information).