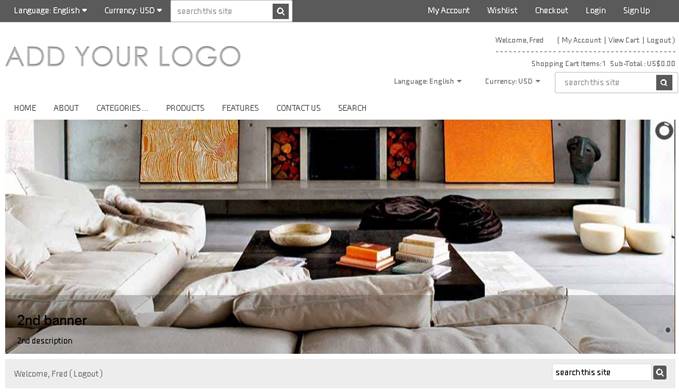
VPCARTlayout comes with two sections of main layout –
•Header file –shoppage_header.htm

•Footer file –shoppage_trailer.htm

With VPCART 8.00, you are now able to modify the look of the
header and footer through the Layout Manager in the administration section.
Please see page 91regarding the Layout Manager.
The layout of
header and footer can also be controlled from the stylesheet file called
“main-responsive.css” and “basic-style.css”located in folder
“templates/default/css”.
File shoppage_header.htmgenerates the top navigation, logo and background for all shopping pages. You can edit it as you would a normal HTML page using your favorite HTML editor – for example, if you want a background image, the standard HTML BODY tag is in this file.
File shoppage_trailer.htm generates the bottom navigation, copyright for all shopping pages.
Note: If you are using tables for your layout, editing these files separately may cause your table structure to be corrupted. To stop this, we recommend the following:
1. Copy
the HTML from shoppage_header.htm into a new HTML document in your favourite
HTML editor.
2. At the bottom of this HTML, add a comment as follows –
<!-- END
SHOPPAGE_HEADER -->
3. Copy
the HTML from shoppage_trailer.htm to the bottom of the HTML document you
created in step 1.
4. Make
your changes.
5. Copy all HTML before the comment added in step 2 into the shoppage_header.htm file and save.
6. Copy all HTML after the comment added in step 2 into the shoppage_trailer.htm file and save.
If you want VPCART to display your custom header and trailer page for the front store, you can set the configurationsbelow:
|
xUniqueFrontpageHeader |
Enter your custom
file name (HTML) to be displayed as the header for the
storefront; e.g. myownheader.htm. |
|
xUniqueFrontpageFooter |
Enter your custom file name (HTML) to be displayed as the footer for the store front;e.g. myownfooter.htm. Make sure you upload the template file into folder “templates/default” |
Furthermore, if you do not wish to display the default
component that is usually in the default.asp page, such as the Welcome screen,
News / Blog / Product Highlights, Latest Products, you can turn off all of these
completely using the configuration below:
|
xloadhomepagebodycontent |
Default value is
Yes. |
We will try to give you an example for this.
Let’s say
we setup the configurations below:
xUniqueFrontpageHeadervalue set to :
myownheader.htm
xUniqueFrontpageFooter value set to :
myownfooter.htm
xloadhomepagebodycontentvalue set to :
No
And then we create the custom front page header
and footer template file as shown below:
myownheader.htm, which contains the HTML code
below:
<html>
<head>
<title>My store</title>
<meta http-equiv="Content-Type" content="text/html; charset=iso-8859-1">
</head>
<body bgcolor="#099bd7">
<div align="center">
<br>
<br>
<br>
<br>
<br>
<br>
<img src="images/mybanner.gif" border="1">
<br>
<br>
<a href="shopdisplaycategories.asp">Click here to view our products</a>
<br>
<br>
<br>
<br>
<br>
<br>
<br>
And myownfooter.htm, which contains the HTML code below:
Copyright 2015 - mystore.com
</div>
</body>
</html>
And then upload both
myownheader.htmand myownfooter.htmfile into the folder
“templates\default”.
Note : The HTML code above is just an example
how you can design your own homepage header and footer.
And here is the
preview of the homepage after you have setup your own custom unique header and
footer template :
